Creating Useful Wood Projects, Both Large and Small
Hammond Organ Cabinet Construction
Written by on January 12, 2017
HAMMOND B3 CASE CONSTRUCTION (con’t.)
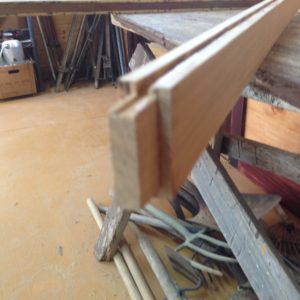
Next I made the front rail that goes into the mortise cut on the sides. It’s not just a rectangular piece that is easy to make…oh no! It has a dado along with a slight recess running along the inside. This was done to accept a small clamp that goes underneath the lower manual after it is set into the cabinet. Folks that deal with this stuff know that there is a small metal piece with a screw they have to remove before they can take out the manuals. Here’s a picture of the end of the piece. You can see the complicated cut that had to be made. One side of the cheeks is slightly lower than the other, and faces the inside of the case. It is shown with the bottom up:
One other thing to note about the positioning of the front rail mortise. I found by making an error, that it is necessary to make a template first of the end of the assembled manuals. This will serve two purposes. First, it will allow for the proper adjustment of the top of the front rail (which ends up about 1/8″ below the front manual metal trim piece, and secondly, accurate positioning of the holes through the bottom to hold the manuals in place. I did this backwards in this first case. I WILL NOT make that mistake again. It was a true pain to exactly find the center point of the manual hold down holes the way I did it initially.
The next thing to make was the bottom. I don’t know if plywood for the bottom would add a tremendous amount of weight to the cabinet, and I may use it in the future when I do this again. But the boards I glued up for this one are really light. Here’s a photo of them glued up:
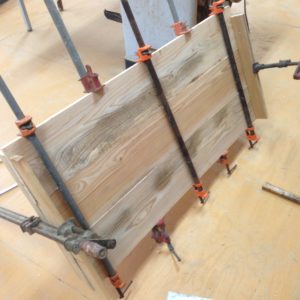
I still do the traditional method of flipping the grain one way and the next board the other way when joining wide boards. I’ve read where it makes no difference, but it is an age old way of doing it, and there is no need for me to change now…I’m too old. Anyway, after glueup, the next day I took off the clamps and cut the thing to size (remembering to angle the front). I sanded both sides well. I placed the bottom and checked for fit into the sides.
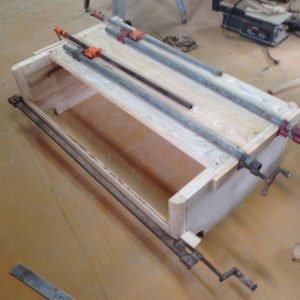
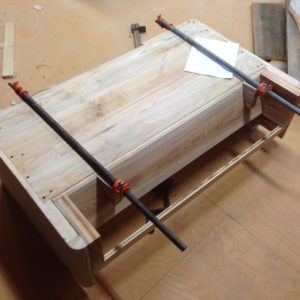
When I was happy with the fit of the bottom and the front rail, I glued and screwed them on. I then placed on some clamps after using a wood scrap to keep the sides perpendicular to the new bottom during glueup. The front rail had to be installed along with the bottom in order to get the tenons in place. Here’s a picture of the glueup:
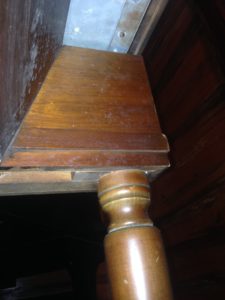
I then cut the angled blocks for the lower front of the cabinet that support the front legs. Remember that my project is to be portable, and so I did things a little differently than the original. I used a solid piece with an angled cut to follow the kneeboard. Hammond used several pieces in this area used to accept the rectangular top of the leg. I am using a 1 1/4″ dowel at the top of the leg, and so I needed something solid to drill my holes into. Here’s a picture of the original area that I’m talking about:
Next I cut the interior side support pieces that hold the manuals in position. They mount on the bottom and are secured flush to the cabinet ends. The front of the blocks are angled to allow support of the kneeboard. After setting them in place, I glued them in and then used some long drywall type screws to secure them through the bottom and and into the case sides. I then cut the front kneeboard to size. It has a round over at the bottom, and simply butts into the ends.
After sanding the kneeboard on both sides, I glued and screwed it on. I screwed in on into the angled side blocks. (They appear in the photo below showing the upright case.) I then nailed it into the bottom from the front with small finish nails which were recessed and filled. Here’s a picture showing all of this. You can see the rounded over area on the kneeboard next to the bottom. The front blocks are simply set in place for the photo. The screws into the side blocks are therefore covered up by them:
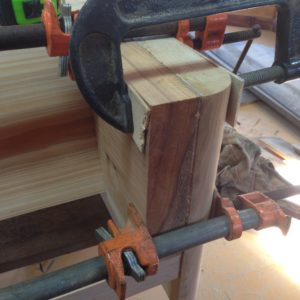
Next, I glued on the leg blocks. Before doing so, I made another of the 1/16″ x 1/16″ saw cuts that appear on the original between the front rounded corner blocks and the leg block. Here’s a photo of that:
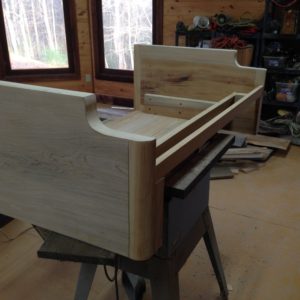
And here’s a picture showing the case after removing the clamps and flipping it right side up:
0 Responses to Hammond Organ Cabinet Construction
Comments are closed.