Creating Useful Wood Projects, Both Large and Small
Hammond Organ Cabinet Construction
Written by on January 12, 2017
HAMMOND B3 CASE CONSTRUCTION (con’t.)
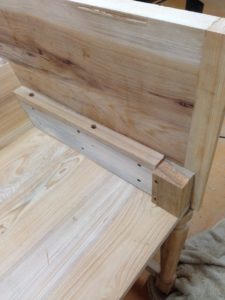
The next step was to apply a couple of blocks to the rear of the inside to accept the holes for the rear legs. Being careful to align them flush with the bottom, I installed them with glue and screws. (I told you that I would share with you when I make mistakes. This was one. Later in the project, when I was working on the removable back, I realized the two blocks should be set back about 3/16″ from the bottom…not flush. There is a lip on the back that rests on the bottom, and the flush blocks shown in the photo held it off the bottom. I had to take a chisel to the two blocks and trim them back a bit. Also, there are two small wood blocks glued to the back for additional support to the back. They also had to be moved a little toward the inside of the cabinet to allow for my modified leg system.) Here’s a picture showing the block behind the support board for the manuals:

The next step was to drill the four 1 1/4″ holes into the bottom of the case to receive the legs. I flipped the case upside down and did some VERY CAREFUL measuring of the leg assemblies and made a center point of where they should be on the bottom. The next challenge was to drill the holes as close to vertical as possible with a hand held drill. The solution turned out to be easy. I went to the drill press and drilled some 1/4″ holes into a 1 1/2″ thick board. I then took it over to the case, and having put the bit into my hand held drill, pushed it through the hole far enough to center it on the hole to be drilled. Then I slowly lowered the board flat onto the base, and happily drilled away, making a perfectly vertical hole into the blocks and case. I then took a new 1 1/4″ space bit and drilled the holes to the depth needed for each individual leg. (They can only go one way, and the same leg will always be in the same hole.)
The day had finally arrived for the moment of truth. Either the cabinet would be stable when I placed on the legs, or it would not be. If not, I was prepared to simple glue the case together. After assembling the case…..HAPPY, HAPPY, HAPPY!!!
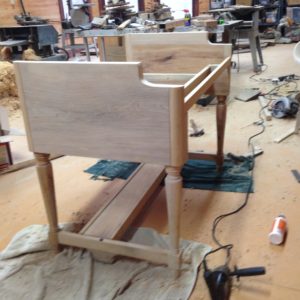
It was very stable. I was elated. This was even before the top is on which will add even more rigidness. The back may help a small bit also when the hand screws are in to hold it on. So we are now, good to go. I am quite sure I will now have a portable Hammond B3 (CV)! Here’s a photo of it put together:

0 Responses to Hammond Organ Cabinet Construction
Comments are closed.