Creating Useful Wood Projects, Both Large and Small
Lumber Storage Shed
Written by on January 13, 2017
FRAMING
The framing of the building was fairly straight forward. I stood up the 2 side walls and rear walls using 8′ long 2″x4″s spaced at 16″ centers. I used a 2″x4″ bottom plate, and a two 2″x4″ top plate. If you’ve done framing before, you know that the upper plates lap at wall intersections. This provides stability in the corners. The front wall with the doors was about 10′ high I believe. The upper sides were filled in with 2″x4″ blocks in line with the studs below. The last wall to stand up was the center one which runs front to back.
One more important point to note is that the side and center wall studs were spaced the same so that the shelf arms would all line up. Keep that in mind if you decide to build one of these.
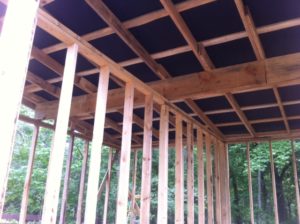
I placed a double 2″x12″ beam on top of the side and center walls across the center of the building side to side. This once again allowed me to use shorter boards for the rafters to rest upon and lap at the center. When you work alone, it’s not a lot of fun to lift long boards by yourself. Just a tip. (I’m smiling here.)
Here’s a picture showing the beam sitting on the walls side to side. I think it was taken from the right front door looking up. You can also see where the rafters lap on top of it:
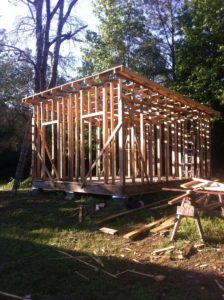
And here’s a picture of the completed framing:
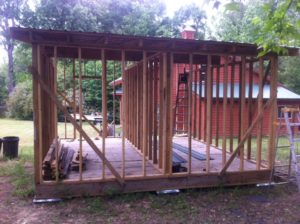
And here’s a photo of the back side:
I had some help putting on a metal roof. We put on 2″x4″s about every two feet spacing to brace the rafters first, and then applied 15# felt over them before adding the metal roofing. I let the metal overhang about 4″ since we were later to add a 1″x8″ fascia board and a 1″x4″ trim board around the top over the fascia board. This gave a finished metal overhang of about 2″. I used 8″ pine beveled lap siding that I made on my bandsaw mill. (I plan on doing a post showing how I cut the lap siding with a piece of scrap wood as a jig!) We first applied felt over the walls, and then the lap siding. We then added a 1″x4″ trim piece to the top of the siding after we nailed on a 1/2″ x 12″ soffit board (that I also cut on the mill.) Here’s a few pictures I took during the siding installation:
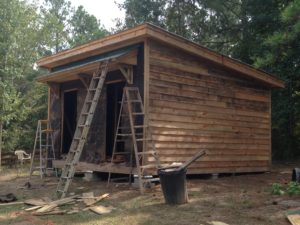
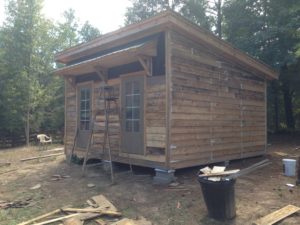
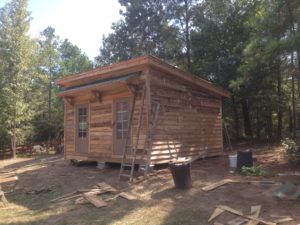
The small roof over the doors was a design element that I added for looks as well as functionality, mainly to protect the doors from rain. It turned out kinda cute I thought. It was tricky to build though, and I had a lot of little tacky sketches to go by that I drew out after some powerful head scratching.
0 Responses to Lumber Storage Shed
Comments are closed.