Creating Useful Wood Projects, Both Large and Small
Lumber Storage Shed
Written by on January 13, 2017
SHELVING
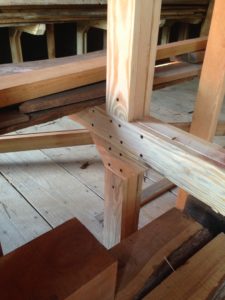
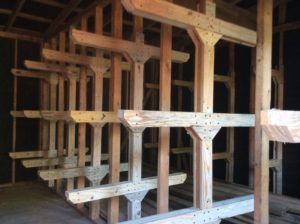
I was feeling pretty good after she had some paint applied. I used some flat Valspar exterior paint, and it only took one coat. That should last a good while before I need to do it again. The next thing to do was to build the shelf arms. Like I said before, this took a LOT of thought to get a 24″ wide arm sticking out that would not sag with the weight of the lumber. What I came up with is extremely stout, and seems to do the job nicely. Here’s a picture of it:

I placed them on every other stud (remember what I said about lining up, and pre-planning where the arms would be located.) I used 2″ drywall type screws, and it took a LOT of them. Nails would work themselves loose, and screws will not. I wanted the tops of the arms to be 2′, 4′, and 6′ above the floor. After some calculating, I began by screwing a 1″x4″ on both sides of the stud, and then spacer cut on a 45 degree angle as you can see set on top of that. The angled board helps the arm not to sag. The process was repeated all the way to the top arm. Another little 1″x4″ spacer was placed at the top to provide additional support. The side wall arms are 24″ and the center wall arms are 48″. I angled under the outside arm corners to avoid making additional holes in my head. I also added a 2″x4″ between each of the arm 1″x4″s. Like I said, the shed turned out great.

Well, that’s my wood shed story, and I’m sticking to it. Happy building!
0 Responses to Lumber Storage Shed
Comments are closed.